Prep Time: 15 minutes
Fermentation Time: 7-14 days
Total Time: 7-14 days
Servings: About 1 pint (16 oz)
Why Make a Lemon Ginger Ferment?
This recipe combines the bright, citrusy flavor of lemons with the warm, spicy kick of ginger. It’s rich in probiotics, which support digestion and immunity. It’s also versatile—use it as a condiment, mix it into drinks, or add it to salads. Plus, it’s easy to make with just a few ingredients and no special equipment beyond a clean jar.
Ingredients
- 3 medium lemons (organic, washed thoroughly)
- 2-inch piece of fresh ginger (peeled)
- 2 tablespoons sea salt (non-iodized)
- 2 cups filtered water (chlorine-free)
- Optional: 1 teaspoon honey (for a slight sweetness, omit for strict diets)
Learn how to store fresh herbs like ginger for longer freshness at Best Way to Store Fresh Herbs.
Equipment Needed
- 1 pint-sized mason jar with lid (sterilized)
- Sharp knife or mandoline slicer
- Cutting board
- Measuring cups and spoons
- Mixing bowl
Step-by-Step Instructions
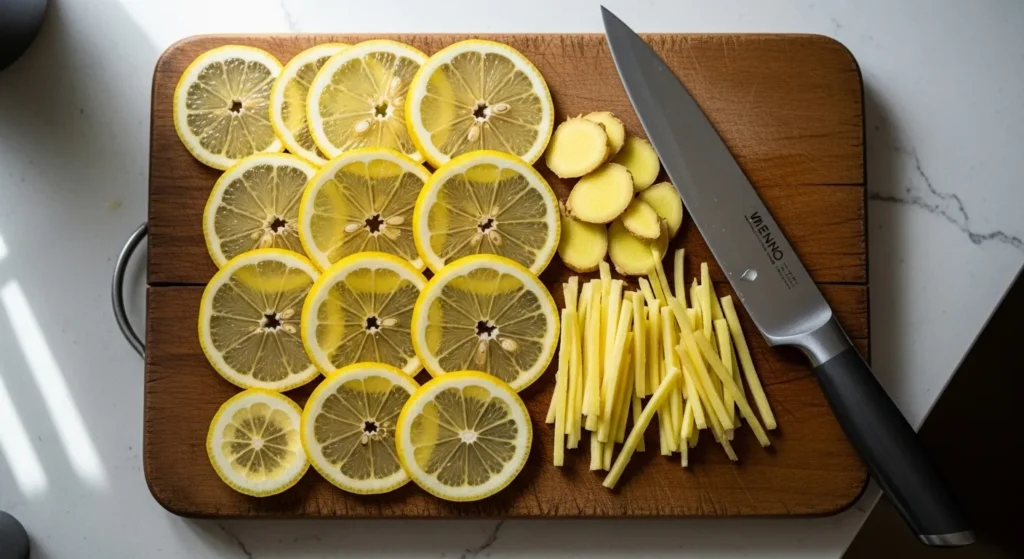
- Prepare the lemons: Scrub lemons under running water to remove any wax. Slice them thinly (about 1/8-inch thick) and remove seeds.
- Slice the ginger: Peel the ginger using a spoon. Slice it into thin matchsticks or grate it for a stronger flavor.
- Make the brine: In a bowl, dissolve 2 tablespoons of sea salt in 2 cups of filtered water. Stir until fully dissolved. Add honey if using, and mix well.
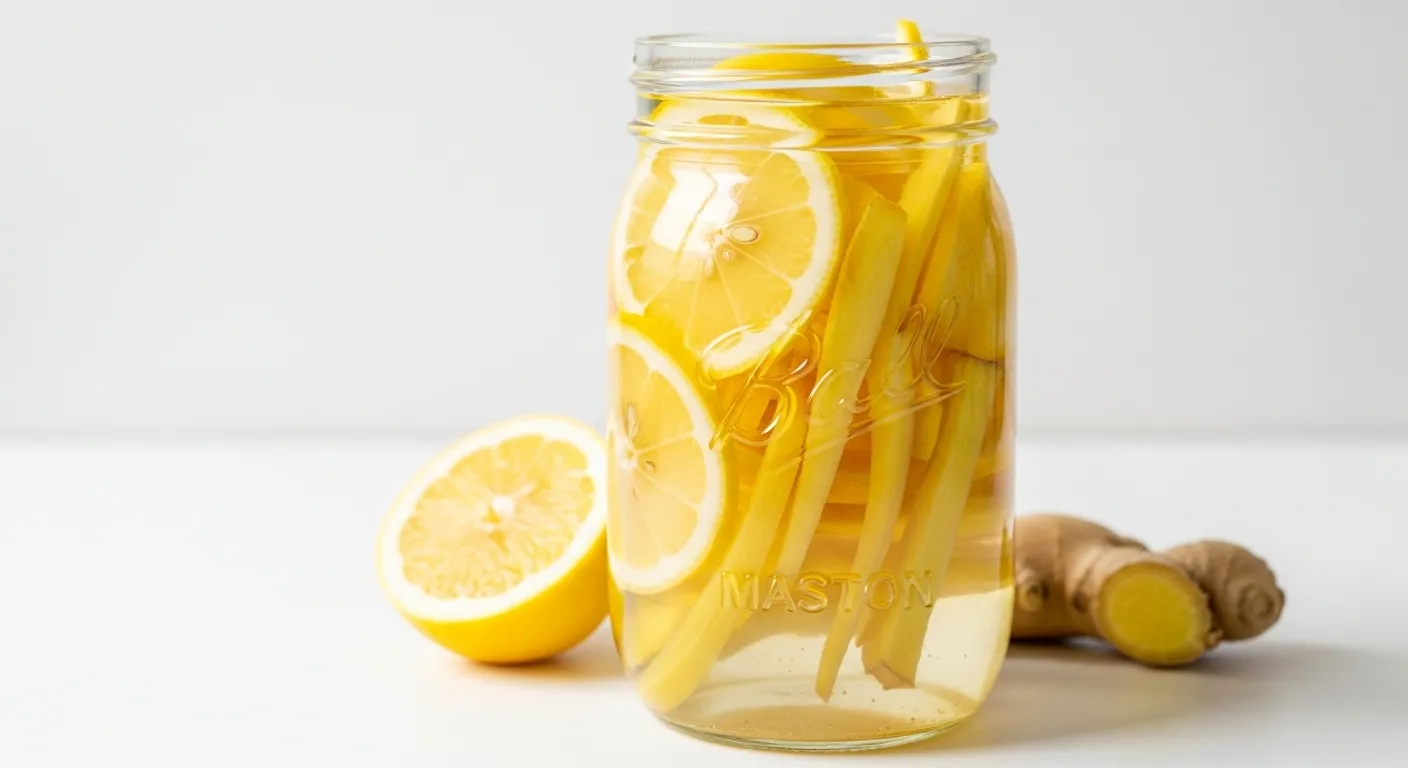
- Pack the jar: Layer lemon slices and ginger in the sterilized mason jar. Pack tightly but leave 1 inch of headspace at the top.
- Add the brine: Pour the brine over the lemons and ginger until fully submerged. Use a clean spoon to press down and release air bubbles.
- Weigh down the ingredients: Place a small, clean glass weight or a folded cabbage leaf on top to keep lemons and ginger submerged.
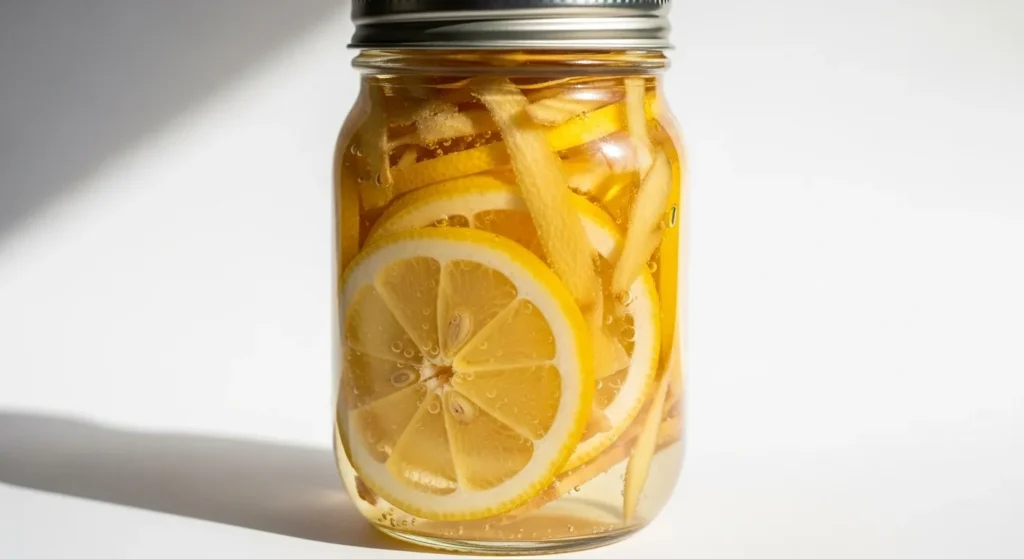
- Seal and ferment: Close the jar loosely with a lid (or use a fermentation lid). Place it in a cool, dark spot (65-75°F) for 7-14 days.
- Check daily: Open the jar daily to release gas buildup. Press ingredients down if they float above the brine.
- Taste and store: After 7 days, taste the ferment. If tangy enough, refrigerate to slow fermentation. It can last up to 2 months in the fridge.
Substitution Ideas
- Lemons: Swap with limes for a different citrus flavor.
- Ginger: Try turmeric root for a similar spicy note and added health benefits.
- Honey: Use a pinch of sugar or omit for a sugar-free version.
- Add-ins: Include garlic cloves or a small chili pepper for extra flavor.
For another healthy recipe, try our 5-Minute Green Smoothie Energy.
Storage and Make-Ahead Tips
- Storage: Keep the ferment in the fridge after it reaches your desired tanginess. Store in an airtight jar for up to 2 months.
- Make-Ahead: Prepare the brine and slice ingredients a day in advance. Store them separately in the fridge until ready to pack.
- Freezing: Not recommended, as freezing kills probiotics and changes texture.
Check out How Long Do Leftovers Last in the Fridge? for more storage tips.
Serving Suggestions
- Add a spoonful to sparkling water for a probiotic drink.
- Mix into salad dressings for a tangy, spicy kick.
- Serve as a side with grilled meats or fish.
- Use as a topping for avocado toast or rice bowls.
Pair this ferment with our Quick 20-Minute Chicken Stir-Fry Recipe for a healthy meal.
Tips and Variations
- Check for mold: If you see fuzzy or colorful spots, discard the batch. Bubbles or cloudiness are normal during fermentation.
- Adjust fermentation time: For a milder flavor, ferment for 7 days. For a stronger tang, go up to 14 days.
- Spice it up: Add a pinch of red pepper flakes for extra heat.
- Double the batch: Use a quart-sized jar and double the ingredients for more servings.
- Cleanliness is key: Sterilize all equipment to prevent bad bacteria.
For more on fermentation safety, visit the National Center for Home Food Preservation.
Why This Recipe Works
The combination of lemons and ginger creates a bright, flavorful ferment that’s both tasty and good for you. The salt brine ensures safe fermentation by promoting good bacteria while preventing harmful ones. This recipe is simple, requiring minimal prep, and delivers a versatile condiment you’ll love adding to meals.