I remember the day my bakeware cabinet turned into a nightmare. I reached for a simple cookie sheet to make those easy fudgy brownies from scratch, and everything came crashing down. Pans clattered everywhere, and I spent more time cleaning up than baking. That mess pushed me to sort it all out. Now, my kitchen stays calm, and baking feels easy. This guide shows you how to do the same. Start with declutter, then set up smart storage. You’ll save time and space right away.
Prep time: 10 minutes
Cook time: Not applicable
Total time: 30 minutes
Servings: 1 organized kitchen
Supplies Needed
List supplies in the order you use them.
- Trash bags for declutter.
- Cleaning cloth and mild soap for wiping shelves.
- Measuring tape to check cabinet space.
- Vertical bakeware rack or adjustable dividers.
- Corner shelves or bins for small pans.
- Labels and marker for clear spots.
- Hooks or tension rods if needed for extras.
Step-by-Step Instructions
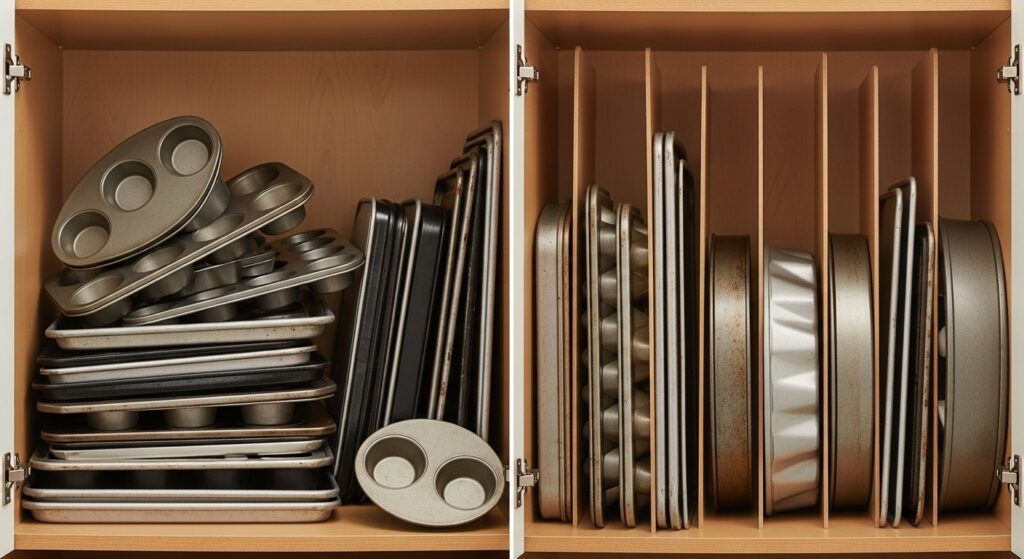
- Empty the cabinet. Pull out all bakeware. Lay items on a counter. Sort into groups: cookie sheets, cake pans, muffin tins, pie dishes.
- Declutter ruthlessly. Keep what you use often. Donate or recycle duplicates, damaged, or forgotten pans. Ask: Have I used this in the last year?
- Clean the space. Wipe down shelves with cloth and soap. Dry well. This keeps things fresh.
- Measure and plan. Use tape to note heights and widths. Decide on vertical or nested storage based on space.
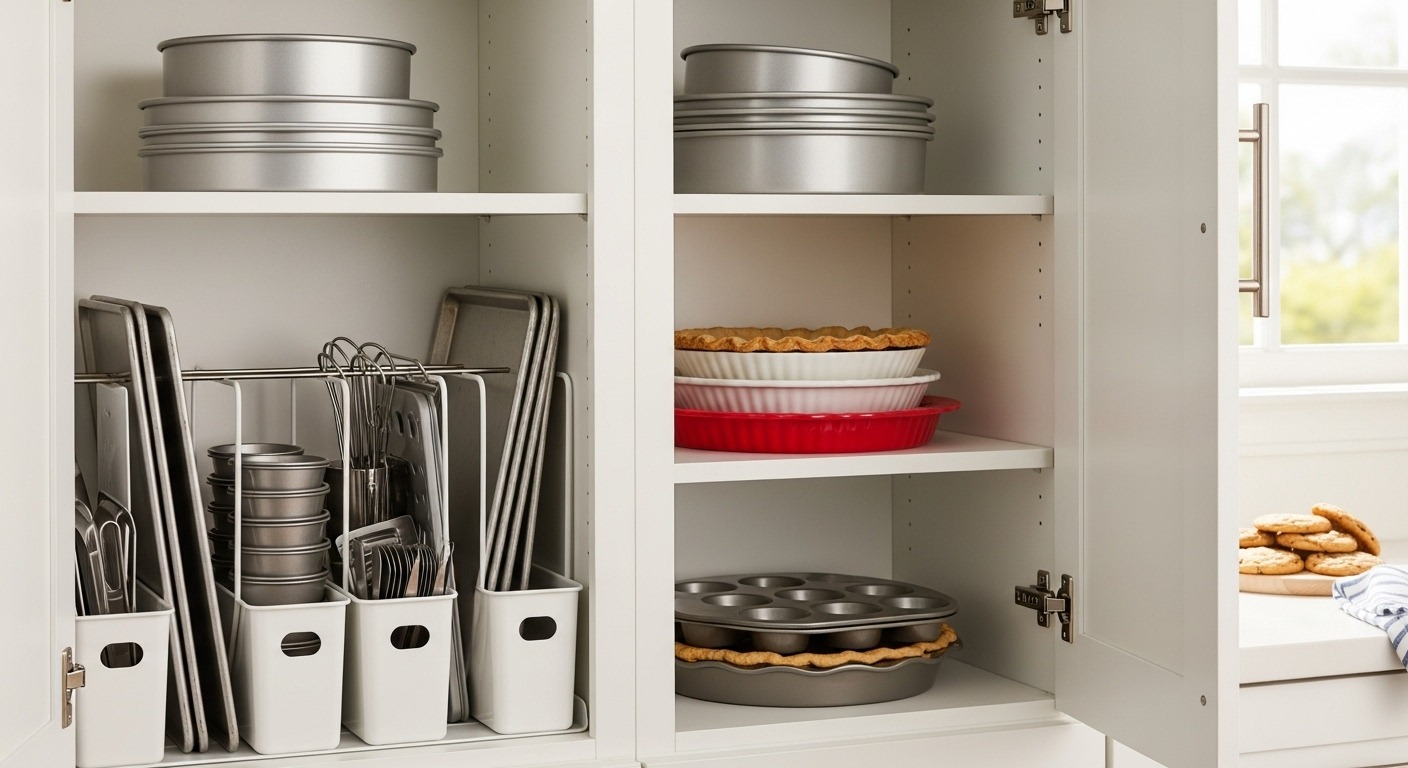
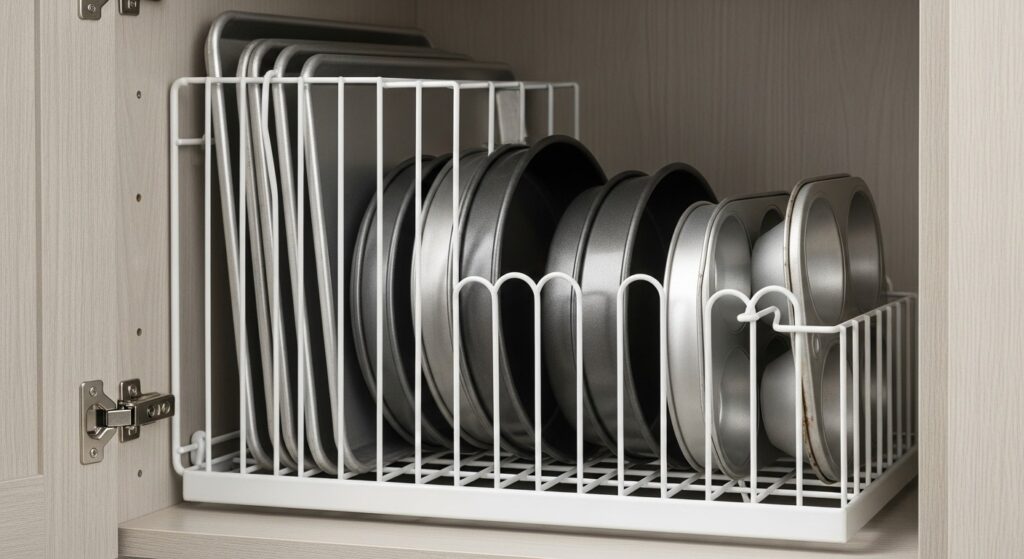
- Set up vertical storage. Place rack or dividers in cabinet. Stand cookie sheets and baking trays upright. Adjust slots for size.
- Nest similar items. Stack round cake pans inside each other. Do the same for square ones. Place in corner shelves or bins.
- Handle odd shapes. Store muffin tins on sides in dividers. Use hooks for cooling racks if cabinet allows.
- Label everything. Mark slots or bins: “Cookie Sheets,” “Muffin Tins.” This helps put items back fast.
- Test access. Grab a pan. If it slides out easy, you’re done. Adjust if needed.
- Put extras away. Move rare-use items to higher shelves or another spot.
Tips and Variations
Group by use frequency. Put daily pans at eye level. For small kitchens, try tension rods in drawers for flat items. Add lights in deep cabinets for better view. Maintain by reviewing every six months.
Variations: In a pantry, use wall-mounted racks. For apartments, opt for stackable bins on open shelves.
Substitution Ideas
No vertical rack? Use a file organizer for sheets. Swap bins for drawer dividers if space is tight. Hooks work instead of corner shelves for hanging tins.
Storage or Make-Ahead Tips
Store in a cool, dry spot to avoid rust. Stack non-stick pans with paper towels between to protect coatings. Plan ahead: List your bakeware in a note app. Check before buying new to avoid duplicates.
For more kitchen storage ideas, check our simple 2-hour pantry organization guide or quick kitchen drawer organization guide.
Serving Suggestions
With organized bakeware, try new recipes without hassle. Pull out a pan for our easy fudgy brownies from scratch or best homemade apple pie recipe. It makes weeknight baking simple. Share your setup in comments below. What pan do you reach for most?
For product ideas, see this guide on bakeware racks. Or learn more about decluttering from here.